")

Recording and Broadcasting System for Seamless Streaming
The User Manual for setting up and operating your recording and broadcasting system. This guide is designed to help you seamlessly connect your computer and interactive live recording system, configure your live stream settings, and begin broadcasting. Whether you’re hosting an event, class, or live presentation, this manual provides all the necessary steps to get your live stream up and running smoothly on platforms like YouTube. Follow this guide to ensure a stable connection, smooth streaming experience, and high-quality broadcast for your audience.
Broadcasting Motherboard – FC-HD01 – Tower
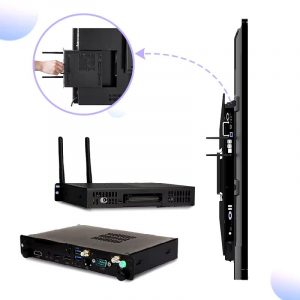
The host must be designed with ARM architecture, be silent, fanless, and wall-mounted. Server and PC architecture hosts are not accepted for stability and reliability in professional recording and broadcasting systems.
The host does not need an encoding box. It combines recording, directing, interaction, management, storage, switching, video matrix, and audio processing in one integrated unit, making it an ideal solution for recording and broadcasting systems.
Host Interface:
- ≥2 line-in inputs
- ≥2 RJ11 (MIC) inputs
- ≥2 line-out outputs
- ≥4 RJ45 ports, with at least 3 POE input interfaces
- 1 NET network port
- ≥1 HDMI input (supports up to 1920*1080 resolution and audio input)
- ≥2 HDMI outputs
- ≥2 USB ports
- Supports automatic camera ID search and binding for 2 non-PTZ 4K cameras
- The host supports dual network segments, allowing separate external communication and camera access networks.
The built-in audio module supports up to 2 MIC inputs, 2 LINE inputs, wireless microphones, and 1 HDMI audio input. It processes echo for classrooms without needing external audio equipment, making it a key component in recording and broadcasting systems. The module includes features like noise suppression, gain control, echo cancellation, equalization, and anti-reverberation, ensuring high-quality audio for any production.
The host supports the touch return function, allowing easy switching between PC and director screens with a floating button. It also supports touch screen recording and broadcasting, as well as operations for large screen OPS recording and broadcasting, making it the ultimate solution for recording and broadcasting systems in educational and professional environments.
Recording Software – V3.0 – Set
Two Modes:
- Local Directing: Perform directing directly on the touch screen with real-time, smooth operation (less than 150ms delay).
- Remote Directing: Use browser-based remote directing.
Video and Audio Encoding:
- Video encoding supports H.264 (MP4 format).
- Audio encoding supports AAC, OPUS, and ISAC.
- Adjustable video bit rate (500Kbps ~ 40Mbps) and audio bit rate (up to 128K).
Image Screen Access:
- Provides 4-channel access for 2 non-PTZ 4K cameras, 1 computer screen, and 1 file preview window.
Recording Modes:
- Movie Mode: Records local director screen and interactive screen.
- Resource Mode: Synchronously records more than 6 1080P videos.
Timed Recording:
- Set recording time in advance based on the class schedule.
Title and Branding:
- Add titles, logos, subtitles, and credits to recordings.
System Control:
- Supports shutdown, restart, and timed restart.
- Automatic synchronization of system time via the network.
One-Click Start:
- Three recording modes: manual, semi-automatic, and automatic.
Streaming Support:
- Supports RTMP and TS push streaming with up to 4 RTMP functions for third-party platforms.
PGM Screen Features:
- Picture-in-picture, split screen modes (1/2/3/4/6), custom layout options.
Switching Effects:
- Over 12 switching effects, including erase, fade, and more.
Recorded File Format:
- MP4 format, with customizable segment recording times (30-240 minutes).
Hard Disk Monitoring:
- View the total capacity of recorded videos on the host.
- Option for loop overwrite or stop recording when the hard disk is full.
External Storage Support:
- Support for mobile hard disks or USB drives for recording and playback.
FTP Upload:
- Automatically upload recordings to an FTP server after stopping, with resume support.
Configuration Import/Export:
- Easily import/export settings for maintenance, upgrades, and debugging.
Real-Time Audio Monitoring:
- Displays microphone volume in real-time as an audio progress bar for teachers.
Audio Processor Settings:
- Manage input/output channels and adjust volumes with analog and digital gain.
- Support for echo cancellation, noise reduction, and automatic gain control.
- Independent IP address for audio processing and remote management via the web.
- Restart or restore the audio processor without affecting system operations.
Remote Director System – V3.0 – Set
- The recording and broadcasting host system includes an embedded IE director management platform, enabling seamless operations across various network environments.
It supports access through popular browsers like IE, Firefox, Google Chrome, QQ, and 360, without requiring any additional plugins. This ensures smooth compatibility and user convenience.
Key features of the system include:
- Remote IE Director Operations: Operate the director interface remotely over both LAN and WAN, offering flexible management and control.
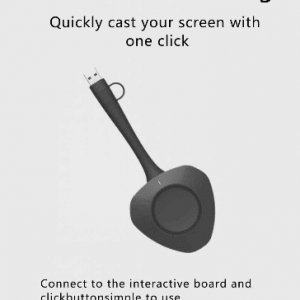
- One-Click Functions: Perform essential operations such as manual recording, live streaming, automatic screen switching, and system configuration with ease, enhancing workflow efficiency.
- Media Resource Mode: This mode enables on-demand playback of recorded files without the need to download them, making content access faster and more convenient.
- Real-Time Viewing: The director interface allows real-time viewing of the live screen, ensuring complete control during live sessions.
With these functionalities, the recording and broadcasting host system optimizes the management, recording, and streaming of content in both local and remote environments, ensuring ease of use, flexibility, and high-quality output.
Teacher Camera – CT200 – Tower
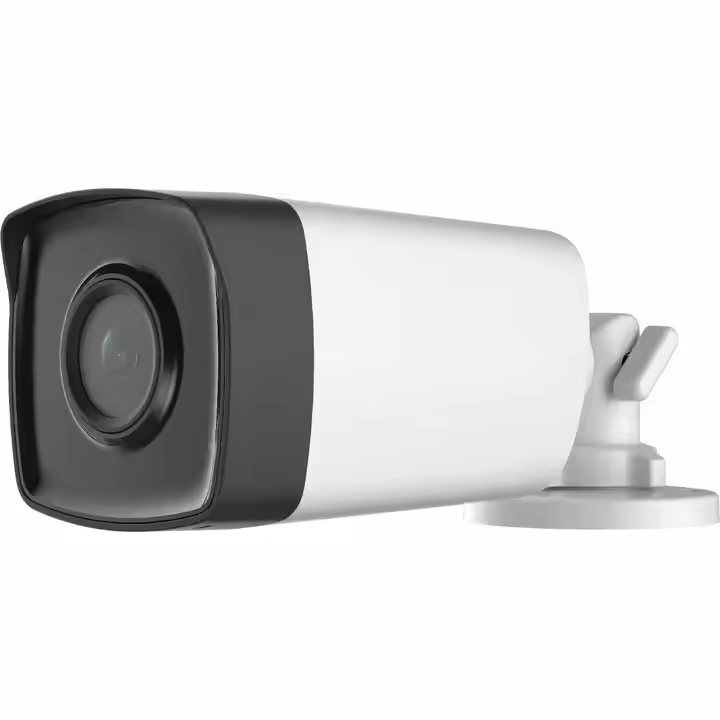
Student Camera – CT200 – Tower
- The system supports 4K ultra-high-definition resolution and can provide up to 4K image encoding output, while also being compatible with 1080p, 720p, and other common resolutions.
Equipped with built-in advanced image recognition and tracking algorithms, it allows for smooth and natural EPTZ (Electronic Pan, Tilt, Zoom) tracking without requiring additional positioning cameras or tracking hosts. Each camera can output two 1080p streams—one panoramic and one close-up—offering versatile viewing options.
Key features include:
- Network Port Audio and Video Encoding Output: Supports H.265, H.264, and MJPEG video encoding standards, along with AAC audio encoding, ensuring high-quality streaming and recording capabilities.
- Network Protocol Support: Compatible with RTSP, RTMP, Onvif, and other common network protocols, providing flexibility for different streaming and network configurations.
- EPTZ and Digital Zoom: Supports both EPTZ and digital zoom functions, providing precise control over the camera for detailed adjustments during live broadcasts or recordings.
- POE Power Supply: The network port supports POE (Power over Ethernet), which allows control, power, and video transmission to be managed via a single network cable, simplifying installation.
- Low Power Consumption: With a DC 12V input and a power consumption of ≤12W, the system is energy-efficient and environmentally friendly.
Omnidirectional Microphone – M10 – Only

- Sensor type: Electret condenser.
- Pickup distance radius: 6 meters.
- Sensitivity: -42dB ± 3dB (0dB = 1V/Pa @ 1kHz).
- Signal-to-noise ratio: 71dB.
- Output connection: High-quality shielded parallel network cable, combining power supply and audio transmission in one line.
User Manual for Live Stream
1. Connect the Computer and Interactive Live Recording System to the Same Network
- Ensure all items are connected properly and functioning well.
- Connect the interactive terminal to the network via the network port.
- Restart the terminal if needed to establish the connection.
- Use a PC or laptop connected to the same network for better stability.
- It’s recommended to use an RJ-45 cable for a stable connection.
2. Create a YouTube Live Show on the Computer and Copy the Stream Code
- Go to YouTube.com and navigate to the Live section.
- Create a new live stream and copy the stream code provided by YouTube.
- Example stream URL:
tmp//xrtmp.youtube.com/live2/xs9u-1vfm-wpqc-7gxz-0r72
- Example stream URL:
3. Find the IP Address on the Interactive Terminal and Set the Live Stream Code
- Find the IP address on the interactive terminal.
- A. On the computer, enter the IP address in the browser.
- Use “admin” as the username and password.
- B. Locate the live stream page on the computer and copy-paste the live stream URL and code from YouTube.
- Confirm by pressing Submit.
- Go back to the home page and select Direct Control.
- You should now see the live stream page on the interactive terminal.
4. Start and Share the Live Stream Successfully
- On the interactive terminal, press the “RTMP” button to start or stop the live stream.
- The live stream will appear on the interactive terminal screen.
- On the computer, go to the YouTube Live Page, and get the share link for your live stream.
- Share the link with others so they can watch the live show from any location.
We’re here to help! Whether you have questions about our products, or are looking for custom solutions, our team is ready to assist. Reach out to us via phone, email, or our contact form, and one of our representatives will get back to you as soon as possible. We look forward to hearing from you and finding the best solution to meet your broadcasting needs.